
Everything to Know About Overmolded Cable Assemblies By Epec Engineered Technologies
Overmolding has dramatically changed the appearance and functionality of cable assemblies over the last several decades. Through the utilization of the injection molding process, overmolding has allowed cable assemblies to have better functionality by:
- Allowing them to become impervious to fluids, therefore being able to be exposed to harsher environments.
- Providing them the ability to withstand shock, vibration, and continual flexing without damage to the termination point.
- Making them more aesthetic by using tooling that allows for the inclusion of corporate logos and trade names as part on the overmold itself.
- Through the use of 3D printing, models of the overmold can be quickly and cost effectively created to ensure that the overmold meet the application requirements prior to hard tooling.
Read more about custom overmolded cable assemblies.
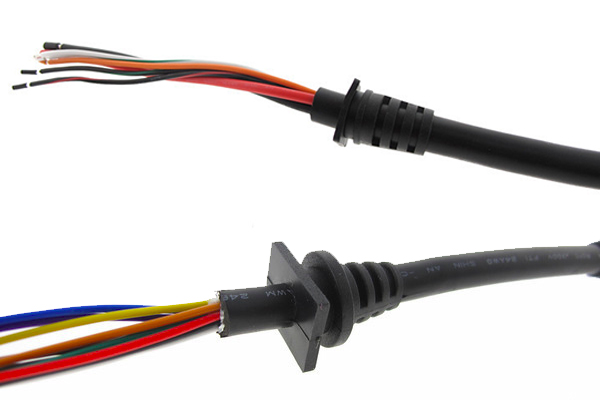
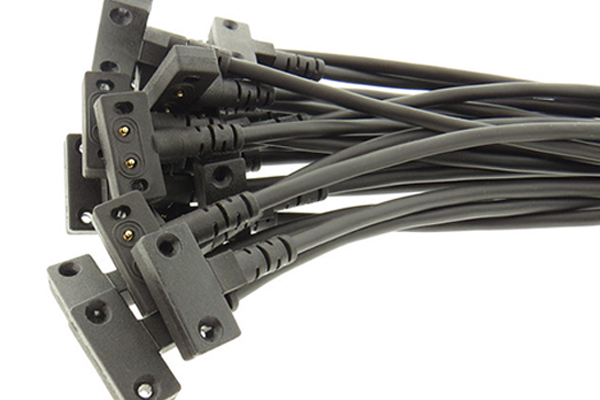
Overmolding Design Considerations
When designing cable assemblies, engineers are using the overmolding process to provide strain or bend relief. This includes grommets as part of the assembly for any point(s) where an assembly needs to be installed through a housing/opening and as a covering for the connector backshells to protect the termination points and contacts. With the complexity of tooling increasing and the number of potential materials that can be used in the overmolding process expanding, any parts that are to be injection molded must be designed carefully.
Consideration must be given to the material that will be used for the mold, the appearance desired of the part after the molding is complete, the composition of the molding material, and the operating parameters of the molding machine itself have to be considered in the overmold design. In tons of applications, it is suggested that a 3D printed model of the overmold is created in order to test the form and fit prior to the more costly hard tooling be created where you may not be able to make a change to the tooling. Here are the 5 custom cable overmold designs with no tooling expense.
Cable Assembly Overmolding Process
The overmolding of a cable assembly is accomplished by forcing a material into a mold cavity under a great deal of pressure. For cable assemblies, the most popular materials used for an overmold are thermoplastic or thermoset materials. The injection molding machine, also known as a press, consists of a storage area for the mold resin. Sometimes it can be called a hopper. Delivery for the material is usually an injection ram or a screw-type plunger enclosed inside a metal tube also known as a barrel. Heating elements are installed into the barrel of the machine causing the mold resin to be heated to a molten state.
The process begins with the resin specified for the mold is fed into the heated barrel of the molding machine at the hopper end. It is then mixed with any desired colorants and transits the length of the barrel to the actual mold where the resin and colorant mixture are forced in the mold cavities. Once inside the mold cavity, the material will cool taking on any features designed into the mold itself including logos, trade names, or part numbers.
Find out more, Managing Development of Your Overmolded Cable.
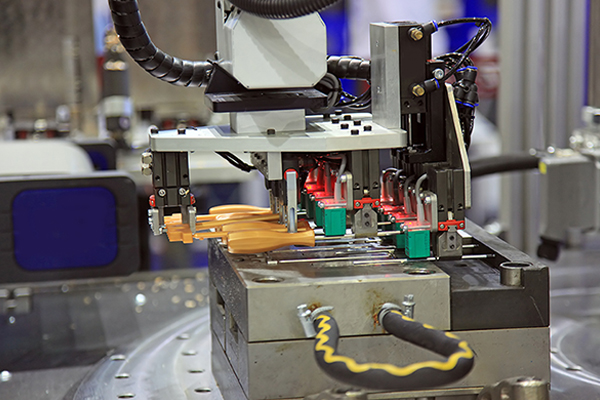 Figure 2: Injection molding machine used during the cable assembly overmolding process by the forming of plastic parts using plastic resin and polymers.
Cable Overmold Tooling Materials
With the introduction of 3D printing, the use of photopolymers for simple injection molds is possible. The photopolymers allow the molding of lower temperature resins for a small number of molding cycles.
Injection molding machines are classified by tonnage. The tonnage of a machine states the amount of force the machine utilizes to keep the mold closed during the injection process. In general, the larger the injection machine the larger the tonnage the machine will be able to exert resulting in a larger molded part being able to be produced.
Molds or dies are the physical tool used to manufacture the molded part. Molds can be expensive to produce and the more detailed the mold the more expensive it will become. Because of this, molds are made of various metals depending on the amount of molding cycles it will be exposed to. If a mold is going to be used in a production environment and is expected to be exposed to thousands of molding cycles, the metal of choice should be hardened steel.
Hardened steel molds are the most expensive to manufacture but the upfront costs will be offset by the longer life expectancy and the higher number of mold cycles it will experience before wearing out. Steel molds are typically used in mass production environments.
Aluminum can be used for molds that will see a limited number of mold cycles or for prototypes to prove out a mold design. Aluminum (soft tooling) offers a much shorter life span than steel but its malleability offers lower tool fabrication costs. Most molds are produced using Computer Numeric Control (CNC) machines or by using electrical discharge machining processes.
The material that is selected for the mold is driven in accordance with the material that will be used for the molding itself. If the resin is to be used is a thermoplastic, the mold material can be steel (hardened or stainless) or aluminum. If the material will be a liquid injection type material like silicone, the tooling needs to hardened steel. If a liquid injection is to be accomplished, the tooling needs to be produced to very exact measurements to eliminate any specs or gaps where the liquid could escape as flash.
For smaller quantities it is also possible to create molds from 3D printed materials to test the mold itself or to produce small quantity runs of cables. Using 3D printed molds is much more cost effective and can be completed much quicker than hard tooling but in many instances can only be used for 50 or 100 cables.
Single or Multiple Cavity Designs
A mold can be designed to be a single or multiple cavities. In a multi-cavity mold, every cavity is designed and produced to be identical allowing for the production of multiple molds during a single mold cycle. In some instances, multiple cavity molds can include cavities that are not identical but those designs create significant issues. Issues like making sure the resin can flow into the different designed cavities completely without creating voids or air gaps.
When molding takes place, the resin material is delivered through the hopper into the heated barrel. Through the actual heating of the material and the forces of the screw, the mixed and softened resin moves forward towards the mold tooling. The molten resin collects at the end of the barrel and is known as a shot at that point. The shot is the amount of resin that is needed to fill the cavities of the mold and includes an allowance for any expected shrinkage of the resin. The typical time for a cavity to fill is seconds.
The injection screw or ram continues to apply pressure to the shot until the resin in the entrance (also called the gate) to the cavity cools and solidifies. The entrances to the cavities are normally the smallest/narrowest part of the mold tooling so it is the first area to completely solidify. When the material at the entrance turns solid, the injection molding machine cycles through its process and prepares another shot and awaits the next molding cycle. The resin in the mold cavities continues to cool and can be removed from the cavity once it becomes solid again.
To aid in the cooling process, water or oil can be circulated through the mold tooling in a series of openings or channels. When the resin is cooled to the point where it is a solid, the mold will open and the completed mold can be removed. The mold removal can be aided by pins or metal fingers inside the mold tooling. When the molded part is removed from the cavities the cycle can begin again.
Pre-Mold and Overmold Designs
Some applications require a mold to be comprised of two parts, a pre-mold, and an overmold. The pre-mold can be previously molded smaller parts or could consist of machined parts such as screws or pins. These parts can be placed in the cavity while the mold is empty and when the overmold cycle occurs the resin flows and solidifies around them.
A process such as this is employed when screws need to be part of the overmold to allow for fastening of the connector to other components of the installation.
Appearance of the Finished Product
The molding process leaves marks and blemishes on the finished product. The marks can be caused by the pieces of the mold tooling having dimensional differences, the mold tooling showing signs of wear, marks where the resin entered through the gate, or marks where the ejector pins touch the resin when pushing it out of the mold cavity.
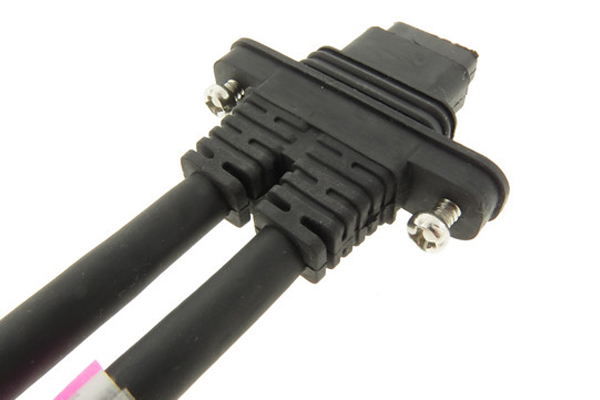 Figure 3: Overmolded cable assembly with minor marks and blemishes from the molding process.
These marks and blemishes are unavoidable but can be minimized through the specification of tight dimensional tolerances when designing the mold tooling and by placing gates in areas of the cavity where they would be less noticeable. Mold tooling designers will take these issues into consideration when designing the tools.
Summary
The last several decades have seen an evolution in cable assembly overmolding due mainly to the development of materials and in the advancement of technology. Overmolded cable products can now be used in almost every industry and application while being able to withstand the rigors of the most demanding environments.
Cable assembly overmolds are no longer the hard plastic that they were decades ago, mold compounds now allow for a soft tactile feel providing surfaces able to be held onto while using gloves. Further material developments will only increase the use of overmolds and provide for more functionality in the products used in every field and industry.
Watch Our Video
Custom Overmolded Cable Assemblies Domestic Manufacturing for Rugged Reliability
Need An Overmolded Cable Assembly Solution?
Our team of experienced engineers is here to help you design a custom overmolded cable assembly solution using house tooling in some instances that can help reduce your NRE costs.
Request a Quote Request Design Support


